


Here, I am going to show how you can change Folder color in Windows 11 and 10 as well Easily.
Yes, this computer is part of our all day-to-day activities. Everything from Fun to Official work is on our PC. But it gets on little by little complex to manage all those files together, the same as it is complex to manage work-life together.
Let’s not go there and find out a way to categorize these files and an easy hack to manage them.
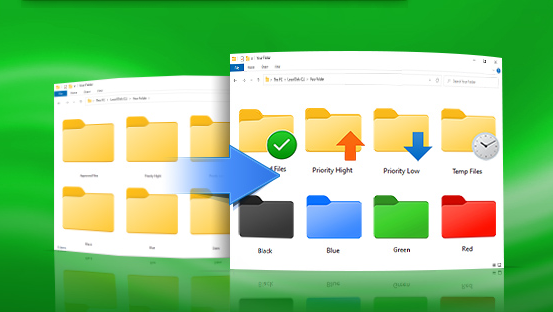
What if we assign a particular color of the folder to a particular tag? It will be great, isn’t it? We can give blue for games, red for work, Green for music anything as per your choice. Yes, we can change the color of the folder.
Read:
- How to Change the Taskbar Color in Windows 11
- How to Run Android Apps on Windows 11 Without Emulator
It will make your desktop look a little unique as well as help you track the right file easily.
How to Change Folder Color in Windows 11
In this blog, I will show you some easy and complex ways to do this. So let us begin.
1. Folder Colorizer Software
It is an easy way; you can choose any color for a particular folder and change it in just a couple of clicks.
To download the software head to Folder Maker Website.
Click on the “Download Now” button and the software will be downloaded. This software will add a new option to the options menu named “Mark Folder”.
- Select the folder you want to change color
- Right-click and select the Mark Folder option.
- Choose the color you want to apply.

That’s it! You changed the color. This software has its Pro version too. The pro version offers many more shades, colors, and a lot of other features too.
2. How to change the Color of the Folder in the desktop.ini File
This is a little bit of a complex process. I have tried to guide you with each step in complete detail. To see the desktop.ini file, we need to make Windows show hidden files. To so that
- Go to the Control Panel
- Open File Explorer Options
- Click on the View tab, and select “Show hidden folders”
- Uncheck the boxes of “Hide protected system files” and “Hide extensions of known file types” and click OK.
- Now head to the folder whose color you want to change and create a new text file in it, with the name desktop.txt
- In the text file, write these two lines
[.ShellClassInfo]
IconResource=IconFileName.ico,0
Put the actual path of the target folder in place of “IconFileName.ico”. You can view the full path from the properties of that folder or the Windows Start Button.
- Save the file. After saving, rename the file as desktop.ini, keep in mind that do not directly create a desktop.ini file. First, create desktop.txt and rename it as desktop.ini it won’t work.
- Now we have to set the folder as Read Only. Due to that, we have to go to the command prompt. Click on the Start button, search cmd, and launch it.
- Type attrib +r “folderpath”. Hit Enter. In place of folderpath include the actual path of the target folder in quotes.
- You will see the color of your folder changed. If not restart the system and you will notice a change.
It is a little technical and complex process, hope you get it correctly.
3. How to Change Folder Color in Windows 11 Properties
This is a really quick and easy way to do it. We will use Windows built-in function to do so. But we need to install a folder icon from the internet.
- Search and install folder icon from the internet. There are many such websites from where you can choose your favorite icon. Make sure you save the icon file in “ico” format.
- Go to the target folder, right click and select the Properties option.
- Click on the Customize tab and Change Icon
- Search and select your downloaded icon file
- Click Apply and OK.
Great job! Your icon has been changed.
So what way you are going to use let us know. These are small hacks you can use to simplify daily activities. So customize your boring desktop to a colorful one.