Here, I’ll show you in this post, How to Lock a Folder in Windows 7 using Batch File. The Batch file creates a Folder Password lock.
However, You don’t need to install Specific Software to password-lock a folder on a windows pc.
Firstly, You just need to create a Batch File that only can be accessed in the Windows system.
In the first step, you’ll get a Batch file code, then Create a Batch file and password lock any folder in Microsoft Windows.
Similarly, The Batch File Code directly comes in process with the command prompt and without having the password, no one can access your password-protected folder.
In other words, You can create a Simply Folder Password Batch File without using any software and it’s super easy to create and also provides complete safety to your folder.
Come on! Let’s see, How we can create a Folder Password Lock in Windows 7.
How to Lock a Folder in Windows 7 Using Batch File
Step 1. Copy this Code
|
cls @echo off title Folder Locker IF EXIST “Control Panel.{21EC2020-3AEA-1069-A2DD-08002B30309D}” GOTO UNLOCK IF NOT EXIST Locker GOTO MDLOCKER echo Folder Created. :CONFIRM echo Are you sure you want to lock the folder? (Y/N) set/p “cho=” IF %cho%==Y GOTO LOCK IF %cho%==y GOTO LOCK IF %cho%==N GOTO END IF %cho%==n GOTO END echo Invalid Choice. GOTO CONFIRM :LOCK ren Locker “Control Panel.{21EC2020-3AEA-1069-A2DD-08002B30309D}” attrib +h +s “Control Panel.{21EC2020-3AEA-1069-A2DD-08002B30309D}” echo Folder Locked. GOTO END :UNLOCK echo Enter password to unlock the Folder : set/p “pass=” IF NOT %pass% == Techsable.com GOTO FAIL attrib -h -s “Control Panel.{21EC2020-3AEA-1069-A2DD-08002B30309D}” ren “Control Panel.{21EC2020-3AEA-1069-A2DD-08002B30309D}” Locker echo Folder Unlocked Successfully. GOTO END :FAIL echo Invalid Password! GOTO END :MDLOCKER md Locker echo Folder created. GOTO END :END |
This is a Batch Programming code that can be accessed on the Windows Platform, copy this entire code.
Step 2. Open Notepad

Type in Search, Notepad then you will see the Notepad icon in the list of programs, click on it to open the Notepad.
Step 3. Paste the code and save as Text File

Paste the entire code into the notepad and save the file in .txt text format.
Step 4. Right Click on File >>Rename

Most Importantly, This step is a part of the next step. Right-click on the Text File and click on Rename.
Step 5. Change File Extension From .txt to .bat

This is an important step, the .bat extension is needed to run a batch programming code on a Windows system.
The code will work on Windows after changing the file extension.
Step 6. Double Click on the File >>Enter Password

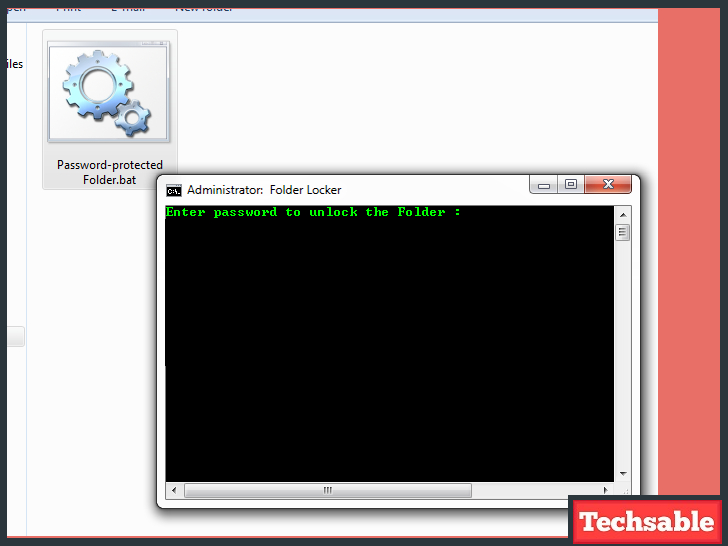
Double-click on the Password-Protected.bat File then a command prompt window will open, Enter the Password, and hit the Enter key.
Note: The Default Folder Password is Techsable.com (You can Easily Change the default Password, Right Click on File >>Edit >> Replace Default password with your own password).
Step 7. Locker Named Folder is Visible Now >>Put your Private Data into it

After Entering the Password, the Locker named Folder will be Visible.
Step 8. Hide “Locker” Folder

Double-click on the File again then you will see a new command prompt window. Type Y and hit the Enter key.
That’s it. Now you can Hide your Private Data without the help of any third-party software.


its working on windows xp but not on windows 7 What to do?? 🙁
Hello Krag,
Sorry to hear that it’s not working for you in Windows 7 but let me tell you these are the Windows 7 screenshots I have mentioned in the post.